🧸 Sunflower Granny Square Crochet Pattern (Free & Beginner-Friendly)
Crochet Pattern · Granny Square · Home Décor · Beginner-Friendly
📖 Introduction
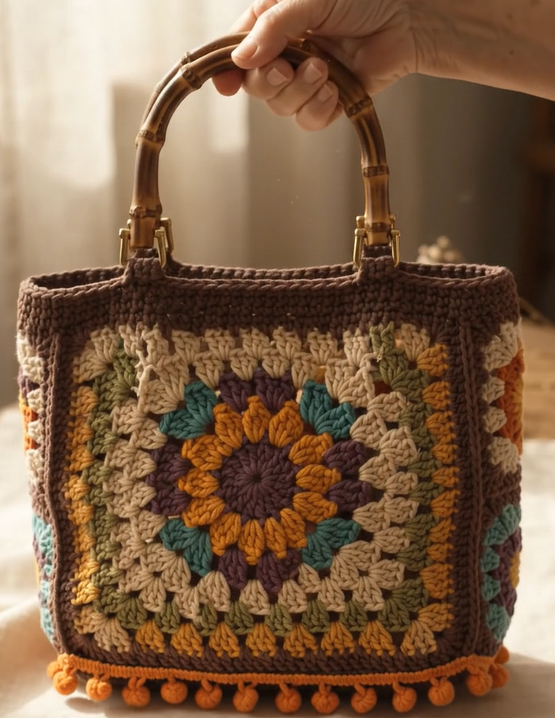
This sunflower granny square turns the classic four-round granny into a small textile flower, with a dusty mauve-purple center standing in for the sunflower’s seed disk and a ring of golden petals unfurling around it before the square resolves into clean, joinable corners. It’s the kind of square that looks complicated in a finished blanket and takes about fifteen minutes once you know the rhythm.
The appeal here is contrast: most granny squares telegraph “granny square” from across the room, but this one reads as a flower first and a square second. Petal texture builds a raised, three-dimensional bump in the center before the piece flattens out into the familiar corner-cluster structure, so you get sculptural detail without any amigurumi-level shaping. That makes it forgiving for a first flower motif — there’s no wire, no stuffing, no fussy assembly, just stitch placement.
Made in a single square, it works as a coaster or an appliqué. Made in a grid, nine or twelve squares becomes a lap blanket, and a long single row becomes a table runner or garland. It’s a natural fit for sunflower-themed nurseries, farmhouse kitchen textiles, autumn décor, county-fair-style gifting, or a “flower a week” project for using up scrap sock-weight and DK cotton.
The most distinctive visual cue is the transition at the end of Round 2: the petal color is worked in clusters that fan out from the center like overlapping seed rows, each cluster separated by a small chain gap that lets the mauve center peek through underneath, so the “seed disk” stays visible even once the petals are complete.
Personalize it by swapping the center for a deep brown or black-brown for a more literal sunflower, working the petals in a two-tone gradient (gold to rust) for an autumnal version, or scaling the whole thing up two hook sizes and working it in chunky yarn for an oversized floor cushion panel.
Sunflower granny square, sunflower crochet motif, granny square flower pattern, and crochet sunflower coaster all describe this same build — useful search terms if you’re hunting for variations later.
🔍 C. Main Pattern Overview
| Detail | Summary |
|---|---|
| Project type | Flat granny square motif (single-use or joinable) |
| Rounds | 4 |
| Colors | 3 (Center, Petal, Border) — swappable |
| Construction | Worked in the round from a magic ring, joined rounds |
| Best for | Coasters, appliqués, blanket squares, garlands |
| Approx. time per square | 12–18 minutes once familiar with the pattern |
🎯 D. Skill Level
Skill Level: Easy (accessible to advanced beginners who have made at least one plain granny square).
Justification: nothing in this pattern requires shaping decreases, wire, or amigurumi-style invisible decreases — it’s entirely increases and clusters worked from a ring, which is the core granny-square skillset. The only technique that pushes it slightly past “beginner” is the petal cluster round, which asks for consistent tension across a repeated 3-dc group.
Techniques used:
- Magic ring (adjustable ring) start
- Double crochet (dc) worked into a ring
- 3-dc clusters (petal groups) with chain-space separation
- Standard granny corner clusters (3-dc, ch-2, 3-dc)
- Joining slip stitch and color changes between rounds
- Weaving in ends across three color changes
📏 E. Finished Size
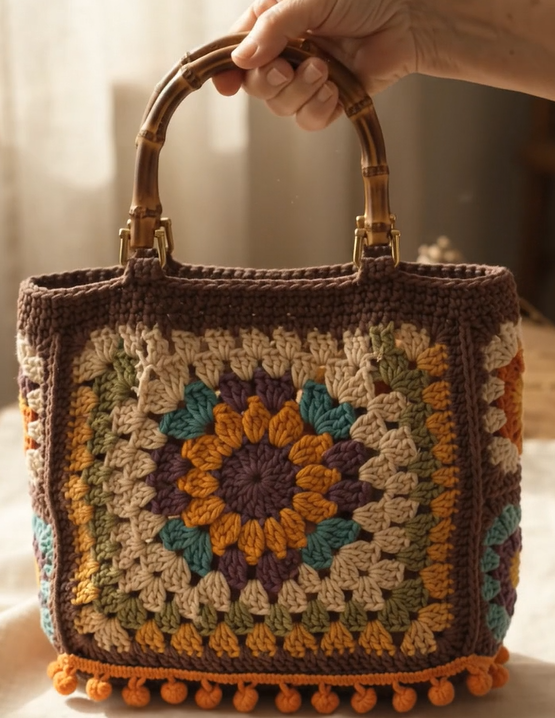
- Single square: approximately 10 cm × 10 cm (4 in × 4 in) using worsted-weight (Aran/#4) yarn and a 4.0 mm (US G/6) hook.
- 9-square blanket (3×3 grid, joined): approximately 30 cm × 30 cm (12 in × 12 in) before border, larger with an added border round.
What changes the size:
- Yarn weight is the biggest lever — DK yarn on a 3.5 mm hook shrinks the square to roughly 8 cm (3.25 in); chunky yarn on a 6 mm hook can push it past 13 cm (5 in).
- Hook size relative to yarn weight — sizing up a hook loosens the fabric and enlarges the square without changing stitch count.
- Tension — looser crocheters may need to size down a hook to match the stated finished measurement.
- Number of border rounds — each additional plain round adds roughly 1–1.5 cm (0.5 in) per side.
🧮 F. Gauge
Exact gauge matching is less important here than consistent tension between rounds, since a granny square’s finished size is judged by eye and by how evenly it lies flat rather than by a swatch measurement. As a reference point: Round 1 (the petal center) should measure approximately 5 cm (2 in) across before Round 2 is added. If your center is noticeably larger or smaller than that, adjust hook size before continuing rather than trying to correct it in later rounds.
🧶 G. Required Yarn Amounts
Worsted-weight (Aran/#4) cotton-acrylic blend, estimated per square:
- Center (mauve/plum): approximately 3–4 g / 6–8 m per square
- Petals (golden yellow): approximately 6–8 g / 12–16 m per square
- Border (sage or teal): approximately 8–10 g / 16–20 m per square
- Total per square: approximately 20–25 g
For a 9-square blanket plus a 2-round border in the border color: roughly 200–230 g total, split across the three colors in the ratios above. Buy an extra full skein of your border color if you’re joining squares, since it also gets used for seaming.
🧰 H. Materials
- 4.0 mm (US G/6) crochet hook (adjust to your yarn weight and tension)
- Worsted-weight (Aran/#4) yarn in three colors: Center, Petal, Border
- Yarn needle (blunt-tip, for weaving in ends)
- Scissors
- Stitch marker (optional but recommended for tracking round starts)
- Measuring tape or ruler
⚠️ Safety note: if this square will be used on or near a crib, playpen, or given to a small child, avoid leaving long yarn tails or decorative fringe that could pose a strangulation risk, and choose securely woven-in finishing over loosely tied ends.
🔤 I. Abbreviations — US Terms
| Abbreviation | Meaning |
|---|---|
| ch | chain |
| sc | single crochet |
| dc | double crochet |
| sl st | slip stitch |
| MR | magic ring |
| sp | space |
| st(s) | stitch(es) |
| rnd(s) | round(s) |
| ( ) | repeat instructions within parentheses the stated number of times |
| [ ] | total stitch count at end of round |
📝 J. Notes Before You Begin
- This pattern is worked in joined rounds — each round ends with a slip stitch to the top of the starting chain, and you turn the work (or not) consistently; instructions below assume you do not turn, working right-side-facing throughout.
- Use a stitch marker in the first stitch of each round if you tend to lose track of round starts — it’s easy to miscount on the petal round.
- Color changes happen at the join of the previous round: work the last slip stitch of the round using the new color, so the color transition sits neatly at a corner or seam rather than mid-side.
- Leave a 15 cm (6 in) tail at every color change for weaving in and, if joining squares, for seaming.
- “Fasten off and weave in” means cut the yarn, pull the tail through the last loop, and use your yarn needle to run the tail invisibly through several nearby stitches on the wrong side.
<!– AD SLOT: post-materials –>
🪡 K. Complete Pattern
🌻 Center & Petals
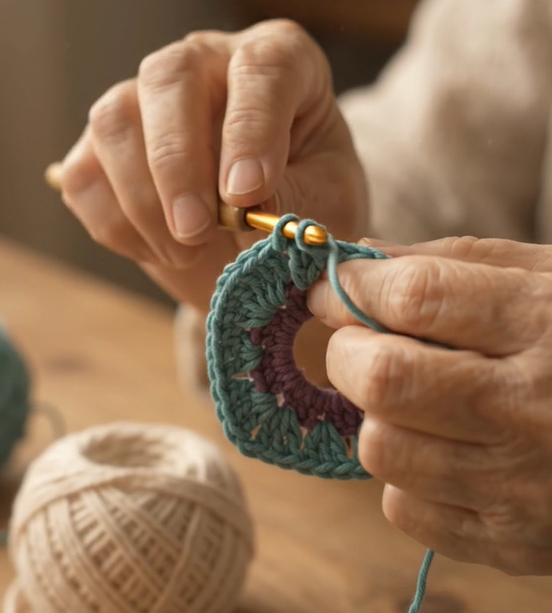
Round 1 (Center color): MR, ch 2 (does not count as a stitch), 11 dc into ring. Pull ring closed. Join with sl st to top of first dc. [12 dc]
Round 2 (Petal color — join in any stitch): Ch 1. In the same stitch as join, work (sc, ch 2, sc) — this is your first petal base. *Skip next dc, in the next dc work (sc, ch 2, sc)** — repeat from * to ** around. You should have 6 petal bases evenly spaced around the center. Join with sl st to first sc. [6 petal ch-2 spaces]
Round 3 (Petal color, continued): In each ch-2 space around, work (2 dc, ch 2, 2 dc) — this forms the visible petal cluster. Repeat in all 6 spaces. Join with sl st to top of first dc. [6 petal clusters]
💡 At this point your flower should already look complete and can be fastened off here as a stand-alone appliqué if you don’t want the square background — just weave in ends.
🎨 Squaring It Off
Round 4 (Border color — join in any petal-tip ch-2 space): Ch 3 (counts as first dc). In same space work (2 dc, ch 2, 3 dc) — this is your first corner. *Ch 1, skip to the next petal-tip ch-2 space, work (3 dc, ch 2, 3 dc) in that space** — repeat from * to ** around, but only work this “corner” version in 4 of the 6 petal-tip spaces, spacing them evenly (roughly every other petal tip, adjusting so corners land symmetrically). In the 2 remaining petal-tip spaces, simply work (3 dc) with a ch-1 on either side, without a corner ch-2 — these become the flat side midpoints. Join with sl st to top of starting ch-3. [4 corners, 2 side-midpoints]
📝 Because a hexagon-based flower center (6 petals) doesn’t divide evenly into a 4-cornered square, Round 4 is the round where the shape actively transitions from six-fold to four-fold symmetry — this is a deliberate original design choice, not a visual detail pulled from the reference photo, and it’s the step crocheters most often want to re-check if their square isn’t sitting flat.
Round 5 (Border color): Ch 3 (counts as first dc), dc in each dc across to next corner ch-2 space, *(3 dc, ch 2, 3 dc) in corner space, dc in each dc across to next corner** — repeat from * to ** around all 4 corners. Join with sl st to top of starting ch-3. Fasten off and weave in all ends.
✅ Square complete — should lie flat with four crisp corners and a raised petal texture in the center.
🎨 L. Styling / Assembly / Stability / Final Shaping
Blocking for flatness: pin the finished square to a blocking mat or towel-covered surface, lightly steam or spritz with water, and let it dry fully before joining to other squares — this is what makes the four corners sit crisply rather than cupping.
Joining multiple squares (for a blanket, runner, or garland): lay squares right-side up in your target grid, and join using either a whip stitch or slip-stitch join through the back loops of both squares, working corner-to-corner along one full side before moving to the next seam. Join in the border color so seams disappear into the existing round.
Symmetry check: before joining, lay your squares in their final layout and confirm every flower’s petal orientation is either uniform or deliberately alternating — inconsistent rotation is the most common finishing flaw in multi-square flower projects.
Recommended assembly order (for a 9-square blanket):
- Make and block all 9 squares before joining anything.
- Join squares into 3 horizontal strips of 3.
- Join the 3 strips together into the full 3×3 grid.
- Work a final border round (2–3 rounds of dc, evenly spaced) around the entire joined piece to hide seams and stabilize the edge.
💡 M. Helpful Crochet Tips
💡 Work Round 1 tightly — a loose center round is the single biggest cause of a “gappy” flower once the petals are added on top.
💡 If your six petal-tip chain-spaces aren’t evenly spaced by the end of Round 3, gently steam-block before Round 4 rather than trying to force even spacing with tension alone.
💡 When placing the four corners in Round 4, mark the chosen petal-tip spaces with stitch markers first — placing them “as you go” is where most sizing mismatches happen.
💡 Keep a consistent number of chains between corners in Round 5 across all your squares if you’re making a set — even one extra chain per side compounds into a visibly uneven blanket edge.
💡 Weave in ends along the wrong-side ridge lines formed by the dc posts, not straight across open space, so tails stay invisible even after washing.
💡 If the petal color is pulling taut and puckering the center, you’re likely skipping too tightly in Round 2 — ease up on tension specifically at the “skip next dc” instruction.
💡 For a two-tone petal gradient, switch petal colors halfway through Round 3 (i.e., use color A for 3 clusters, color B for the other 3) rather than mid-cluster, so the color break stays clean.
🧼 N. Care Instructions
Hand-wash in cool water with a mild detergent and lay flat to dry — cotton-acrylic blends hold their shape best when air-dried rather than machine-dried. If your center and petal colors are strongly contrasting (e.g., dark plum next to pale yellow), wash a test square separately first to rule out dye transfer before combining it with lighter pieces. Store finished blankets or garlands folded rather than hung, away from direct sunlight, to prevent uneven fading of the petal color relative to the border.
Closing
What starts as twelve stitches into a magic ring ends up looking like it took an afternoon of careful flower-shaping — and once you’ve made one, the second and third go noticeably faster. Try it in a single mauve-and-gold pairing for a classic sunflower, or run a few squares in different petal colors side by side for a mixed-flower garden effect. However you make it, it’s a satisfying square to have on repeat: quick enough to finish in one sitting, distinctive enough that it doesn’t look like “just another granny square” once it’s off the hook.
Share the Love
Made a square (or a whole blanket) from this pattern? Snap a photo and tag it — seeing how the colorway choices change the flower’s personality is half the fun of a pattern like this.
Suggested categories: Granny Squares, Home Décor, Blanket Patterns, Beginner Crochet
Suggested tags: sunflower crochet, granny square pattern, crochet flower motif, easy granny square, crochet coaster pattern, flower granny square, beginner crochet pattern, crochet blanket square, autumn crochet, farmhouse crochet décor, join-as-you-go granny square, crochet appliqué flower
A question for you: Which petal colorway are you picturing for your version — a true golden sunflower, or something further from nature, like a two-tone sunset gradient?
You Might Also Like:
- Daisy Granny Square
- Autumn Leaf Granny Square
- Classic Solid Granny Square Blanket
- Mini Flower Coaster Set
- Hexagon Sunflower Motif
A print-friendly version of this pattern can be made available through your site’s print plugin for readers who prefer a paper copy at the hook.
❓ FAQ
Can I make this square with a different number of petals? Yes, though it changes the corner math in Round 4. Six petals divide cleanly into a 4-corner square with two flat side-midpoints (as written); eight petals divide more evenly into four corners with no midpoints needed.
What yarn weight works best for a first attempt? Worsted-weight (Aran/#4) cotton-acrylic blend is easiest to see stitch definition in while you’re learning the petal cluster round — thinner yarns make the ch-2 petal spaces harder to spot.
Do I need a specific hook size, or can I use whatever I have? Use whatever hook gives you a firm, flat-lying Round 1 in your chosen yarn — a 4.0 mm hook is the reference point for worsted weight, but tension varies enough between crocheters that “flat and firm” matters more than matching the exact size stated.
Is this pattern beginner-safe, or do I need granny square experience first? Basic granny square experience (chains, dc, joining rounds) is recommended before attempting the petal round, since the cluster spacing in Round 3 assumes comfort with reading chain-space placement.
How do I keep my square from cupping instead of lying flat? Cupping usually means one round is worked more tightly than the others — most often Round 1. Blocking will correct mild cupping; persistent cupping usually means sizing up the hook for that specific round.
Can I turn this into a bigger motif, like a hexagon or octagon shape instead of a square? Yes — stop after Round 3 (the flower is already a hexagon at that stage) and add plain hexagon rounds instead of Round 4’s corner-shaping round to keep the six-fold symmetry all the way out.
How many squares do I need for a baby blanket versus a lap blanket? A rough guide: 6×6 squares (36 total) makes a baby-blanket-sized piece at this square’s finished measurements; 8×10 (80 total) approaches a lap-blanket size before a border is added.
Can I use leftover scrap yarn instead of buying yarn specifically for this? Yes — this pattern is a good scrap-buster for worsted-weight leftovers, since each square only needs small amounts of three colors and slight dye-lot variation between squares of the same color actually reads as intentional in a finished multi-flower piece.